
How To Repair A Surfboard Crack
Wes Severson February 2nd, 2024 Posted In: How-To Tags: Surfing
Just because your beloved surfboard has a ding or a crack doesn’t mean your board has reached the end of its life. Learning how to repair a surfboard is easier than you probably think and should be a skill that you have if you are a serious surfer. In this guide on how to repair a surfboard crack, we’ll take you through an easy-to-follow step-by-step process that explains the beginner basics and how to pull off a pro-level finish, which will have you back on the waves quickly.
Preparing For the Surfboard Crack Repair
No matter whether it’s a hairline crack or a deep gash, surfboard cracks are no fun. They weaken your board’s strength and allow water to seep into the core, which will eventually sink your board for good. The good news is that with some everyday tools and items available at the surf shop or hardware store, you can preserve the lifespan of your board.
Here’s What You Will Need to Repair a Surfboard Crack:
- Surfboard Repair Kit. These handy kits usually include resin, hardener, fiberglass cloth, sandpaper, gloves, and mixing cups. You can find surfboard repair kits at most surf shops or online. You can also purchase these items individually at most hardware stores.
- Safety Items. Latex gloves, a dust mask, and eye protection are essential to protect yourself from resin fumes and fiberglass dust and chunks.
- Proper Workspace. Choose a well-ventilated, dust-free area away from direct sunlight.
- Assorted Sandpaper or Sanding Sponges. You’ll need a coarse 80 to 100-grit sandpaper or sanding sponge for the initial sanding. You’ll also need a few finer 220 to 400-grit versions for the finishing touches.
- Masking Tape. You’ll need tape to mask off the section you need to repair to prevent unwanted resin from touching parts of the board that don’t need repair.
- Small Foam Roller or Brush. This is used for applying resin and smoothing fiberglass patches.
How To Repair A Surfboard Crack Step-by-Step:
- Clean the repair area. Use soap and water on a rag to clean around the crack, then thoroughly dry the area with a towel.
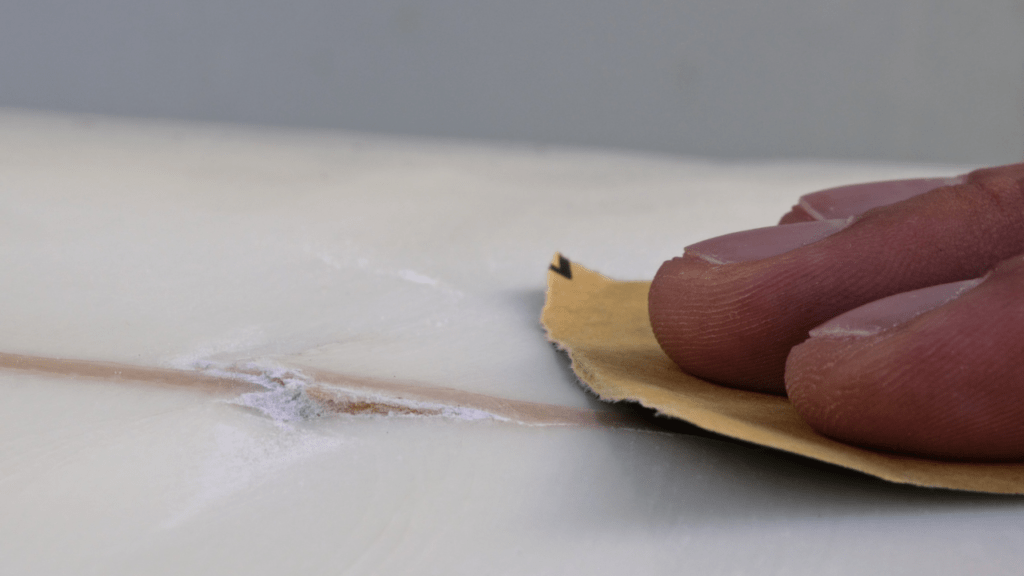
- Masking and sanding. Use masking tape to mask off the area surrounding the crack to protect the rest of the board from accidental sanding or resin smudges. Using the coarse grit sandpaper, rough up the area of the crack to create a textured surface. This will help the resin adhere to the board more effectively.
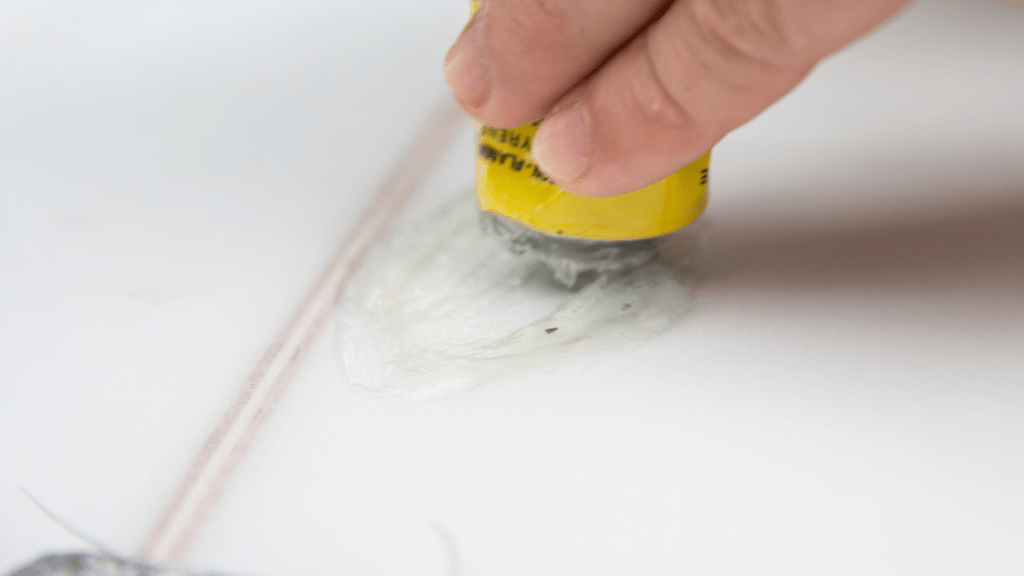
- Get the resin ready. Put on your latex gloves and dust mask and start mixing the resin with the hardener according to the instructions. When it comes to the hardener, a little goes a long way, so err on the side of caution. Apply a liberal amount of resin to the crack and onto the surrounding area. Make sure to fill the crack completely and push out any air bubbles.
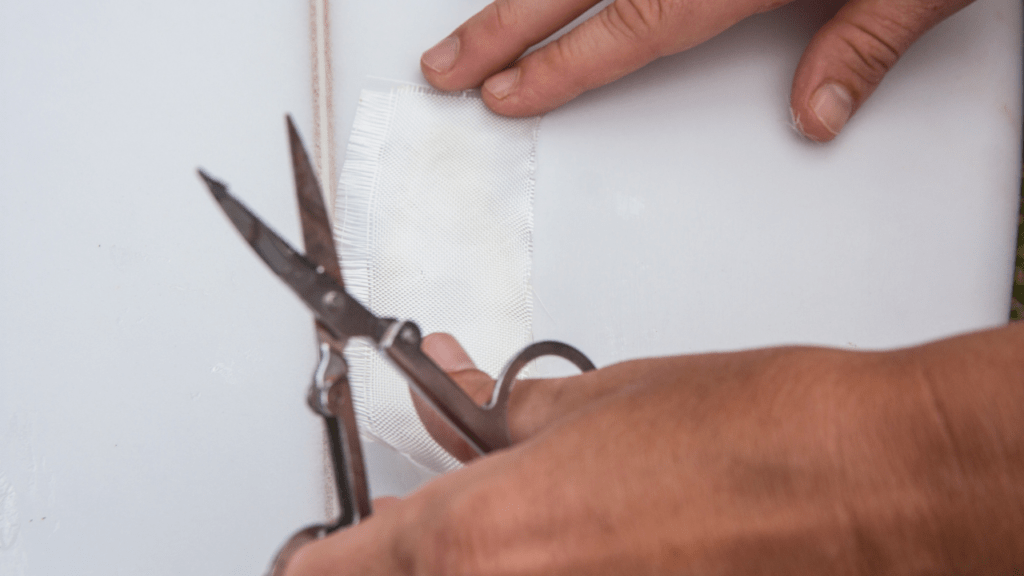
- Applying the fiberglass. Cut a patch of fiberglass cloth slightly larger than the crack. Lay the fiberglass patch on top of the area where you applied the resin. Use a brush or foam roller to smooth out any wrinkles or air pockets that you can see. Next, add another layer of resin over the fiberglass patch to fully integrate it with the board.
- Adding layers of protection. If the crack you’re dealing with is very deep or if you feel you need added strength, repeat step 4 and add another layer of fiberglass and resin. More layers are better for reinforcement but remember, don’t add too many layers because that can create a bulky bump.
- Resin curing time. Let the resin cure completely according to the instructions. Depending on the resin type and temperature, this can take anywhere from a few hours to overnight. Avoid direct sunlight during curing, as it can affect the resin’s hardening process.
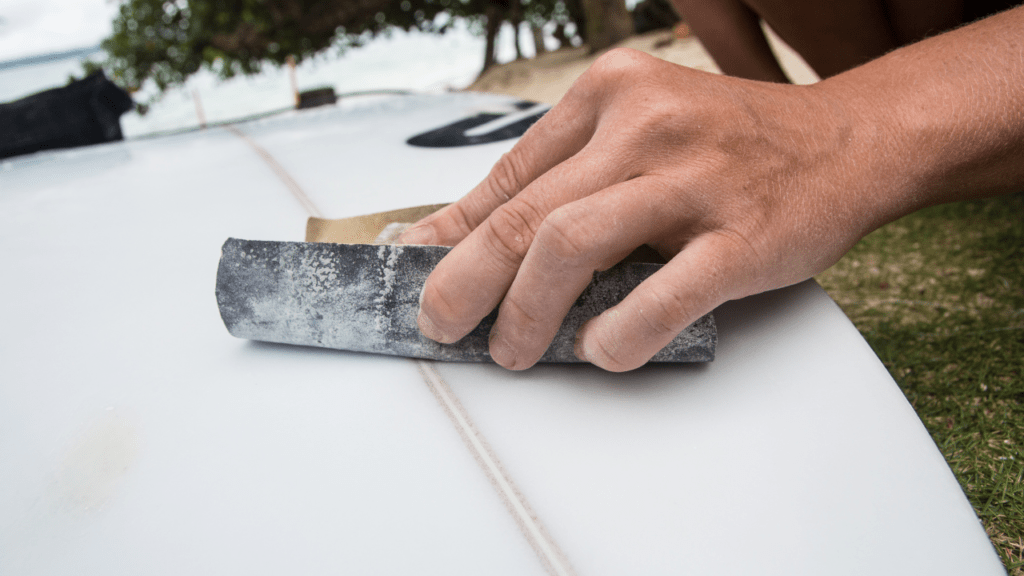
- Sanding. Once the resin has fully cured, peel off the masking tape and start lightly sanding the repaired area. Start with 220 grit to blend the patch seamlessly with the board’s surface, then progress to finer grits for a smooth finish. Wipe away any sanding dust with a damp cloth and inspect the repair for any imperfections. If necessary, apply one more layer of epoxy, let it cure, and do one more round of sanding until you’re satisfied with the results.
- Ding tape or wax. For extra peace of mind, apply a section of surfboard ding tape over the repaired area to add another layer of protection. If you decide against ding tape, apply a coat of surfboard wax to the repaired area and the entire board to create a watertight seal and protect your repair work from further damage.
Conclusion
As you can see, learning how to repair a surfboard crack doesn’t have to be daunting. With the right materials and techniques, you can easily restore your board to its former glory. Don’t be discouraged if your first repair isn’t a masterpiece. Practice makes perfect, but with this guide and a little practice, you’ll be repairing your own cracks like a seasoned shaper. You’ll also be able to teach others how to repair a surfboard crack so they can keep shredding as well.
FAQ: How to Repair a Surfboard Crack
Before diving into the questions, here’s a quick primer: repairing a surfboard crack is all about keeping water out, restoring strength, and making sure your board stays ride‑ready. These FAQs expand on the key steps, tools, and troubleshooting tips that surfers commonly search for when learning how to repair a surfboard crack!
1. What is the best way to repair a surfboard crack?
The best way to repair a surfboard crack is to clean the damaged area, sand it, apply mixed resin, reinforce it with fiberglass cloth, let it fully cure, and then sand it smooth. This process seals the crack, restores strength, and prevents water from entering the foam core.
2. Can I repair a surfboard crack myself, or should I take it to a shop?
You can absolutely repair a surfboard crack yourself if you have a basic repair kit and follow the right steps. Hairline cracks and small dings are beginner‑friendly. Deep or structural damage can still be DIY‑repaired, but if the board is badly compromised, a professional repair shop (or probably a new board) may be the safer option.
3. What materials do I need to fix a surfboard crack?
A typical repair requires resin, hardener, fiberglass cloth, sandpaper (80–400 grit), masking tape, gloves, a dust mask, and a brush or foam roller. Many surfers use a pre‑made surfboard repair kit because it includes everything in one package.
4. How long does it take for surfboard resin to cure?
Cure time depends on the resin type and temperature, but most repairs take anywhere from a few hours to overnight. Keeping the board out of direct sunlight during curing helps the resin harden evenly and prevents yellowing or soft spots.
5. Do I need to use fiberglass cloth for every surfboard crack repair?
Fiberglass cloth isn’t always required for tiny cracks, but it’s essential for deeper or wider damage. The cloth adds strength, prevents the crack from reopening, and helps the repair blend smoothly with the rest of the board.
6. Why is sanding important when repairing a surfboard crack?
Sanding roughens the surface so the resin bonds properly, and after curing, sanding helps level the repair so it sits flush with the board. Starting with coarse grit and finishing with fine grit creates a clean, professional‑looking finish.
7. How can I prevent water from getting into my surfboard after a repair?
Once the repair is complete, you can add ding tape for extra protection or apply a fresh coat of surfboard wax. Both help create a watertight seal and reduce the chance of new cracks forming.
8. What happens if I surf with an unrepaired crack?
Surfing with a crack allows water to seep into the foam core, which can cause delamination, added weight, and eventually a board that won’t float properly. Even small cracks can lead to major damage if ignored.
9. How do I know if my surfboard crack needs multiple fiberglass layers?
If the crack is deep, long, or flexes when you press on it, adding a second fiberglass layer is a smart move. Multiple layers increase durability, but you should avoid over‑building the patch to prevent a bulky bump.
10. Can UV‑cure resin be used to repair a surfboard crack?
UV‑cure resin works well for small, shallow cracks and quick fixes, but traditional resin with hardener is better for deeper or structural repairs. UV resin cures fast in sunlight but doesn’t offer the same long‑term strength as a full fiberglass‑reinforced repair.