
Surfboard Pressure Ding & Dent Repair
Juniper Krog September 9th, 2019 Posted In: Articles Tags: Surfing
Surfboard Dent Repair
If you’ve inflicted minor damage to your surfboard, you can fix it yourself! There are many ding repair techniques and a variety of products and kits on the market, so it can be tricky to know where to start. The first step is always to assess the situation. The strategy you’ll go with will depend on the type of damage you’ve inflicted on your board, the type of workspace you have for doing repairs, and how much time and money you’re willing to spare to get back in the water. To cover the basics, the focus of this post is on punctures, dents and deep scratches in a board, but not major issues that affect the integrity of your board’s overall shape. If you’ve got a simple surfboard pressure ding or dent, repairs are not needed. You only need to fix a board that is taking on water through cracked, punctured, scraped or scratched fiberglass to the point of exposed foam. A snapped surfboard can be fixed too, but the process is complex and involves a great deal of prerequisite knowledge.
So, here are two basic surfboard ding repair techniques that can work for you, if what you’ve done is nailed the reef, hit the rocks, or just dropped your board while rinsing it off at the showers.
Quick and Easy Surfboard Pressure Ding Repair:
If you’re lucky enough to be on a surf trip, your board might sustain a few dings or deeper- than-ideal scratches in transit. In this situation you’ll want a ding repair option that can be done anywhere – even on the beach or a boat. You’ll also want a technique that does not take a lot of time, so you can get back in the water and make the most of the swell you came for. The quickest, easiest, one product solution is an epoxy putty stick, like JB Waterweld. This product comes in a small size, perfect for stashing in your board bag pocket. You can use it to fix any kind of surfboard- fiberglass, epoxy, composites, or wood. Epoxy putty stick cures quickly, and can even cure when wet, so you can get back out and surf again right away. Here’s what you do:
Here’s what you do:
- Use a razor blade or pocket knife to cut away any ragged or lifted edges from around the hole in your surfboard.
- Slice a small chunk of putty from the putty stick. You’ll probably notice that the color of the putty stick center is different than it is at the edge. Add a few drops of water and knead it between your fingers until it softens and the two colors of putty are blended completely.
- Gently push the putty into the surfboard ding and sculpt until it is flush with the surrounding shape of the board.
- In about 15-20 minutes you can sand it down to further perfect your work, but this step is not functionally necessary. You could technically get back into the water even before the putty is dry, and it will still cure within minutes.
- Get back out there and surf!
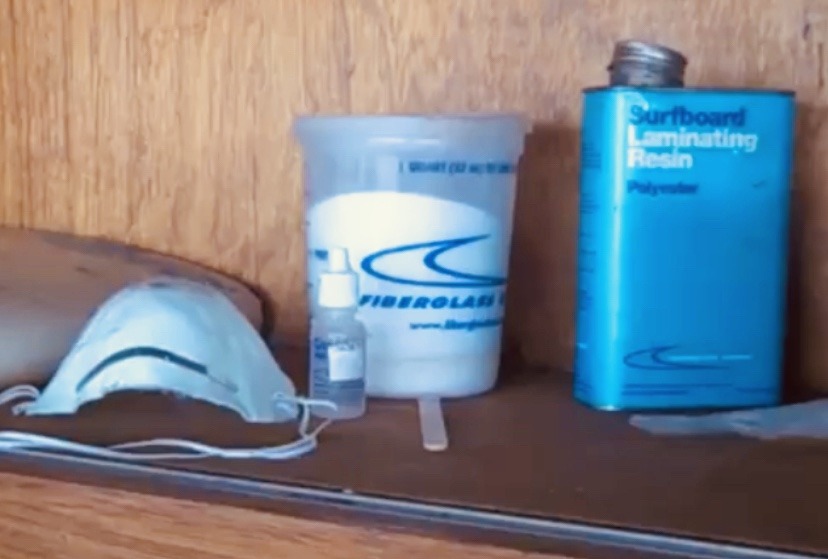
A couple of the supplies you’ll need to fix the surfboard dings and dents!
Method 2 for Surfboard Pressure Ding & Dent Repair:
This classic fix is a longer, more time consuming ding repair technique that can restore the integrity of the board surface to “like-new” if done perfectly. If you follow a good video tutorial or have a friend who’s willing to show you their tricks, you’ll do a better job. First thing you need to do is go to the hardware store (or local marine supply shop), and make some purchases to build a solid ding repair kit that will last.
The basics you will need are: Q-cel, sanding resin, finishing resin, fiberglass cloth, a small bottle of catalyst, sandpaper, paper cups and popsicle sticks, a variety of small paint brushes, razor blades, a wax comb, scissors, and resin pigment in the color of your board(s). For your safety, get disposable masks for fumes, some plastic gloves, and goggles (or wear a pair of wrap-around shades).
Once You Have Your Supplies, Here’s What You Do:
Step 1: The set-up. Designate a place to fix your board, somewhere safe from the elements like a covered carport or workshop with good ventilation. Place the board across two sawhorses, or on a work table, cushioned underneath with foam or rolled towels. Remove any wax from around the area you’re fixing, about 5 inches in all directions. This can be done by scraping it with the flat side of a wax comb, or an expired credit card, and follow with a towel dipped in hot water to wipe away the residue. Use a blade to cut away the edges of the ding and dig out any reef, sand, or damaged foam from the hole.
Step 2: Fill the hole. Mix some Q-cel in a paper cup with enough resin to get the consistency of smooth pudding. Add catalyst and mix it more; try to avoid whipping in air as this will cause your repair to bubble as it cures. You’ll use about 7-10 drops of catalyst (but it depends on the amount you’re mixing plus the temperature and humidity of the air, so read the label and apply to your situation). Fill the hole with this concoction by pouring it carefully – don’t overpour- that will lead to more sanding later.
Step 3: The first round of sanding. Once the Qcel hardens, sand it down so it’s just a little below the surface, to leave room for your new fiberglass patch.
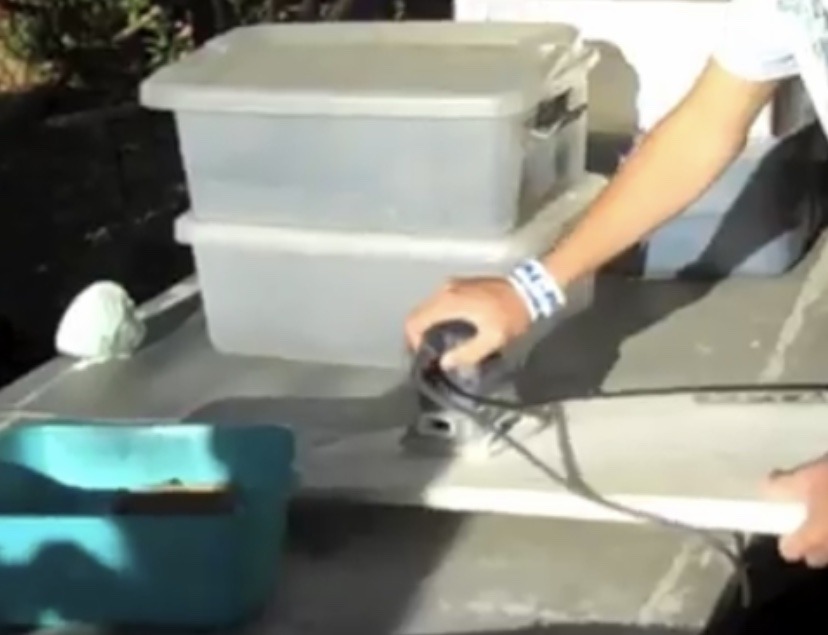
The sanding process!
Step 4: Cover the ding. Use sharp scissors to cut a patch from your fiberglass cloth just a little bigger than the damaged area, and place it where it will need to stay to completely cover the ding. You can leave this for a minute while you prepare the resin coating which will blend with the glass cloth to create a new watertight surface over the hole in your board. To prepare, pour an ounce or two of sanding resin into a clean cup or yogurt container and add pigment if you want to match the color of your board. Then add the correct amount of catalyst. Too much catalyst can cause cracks; too little may cause the resin to remain sticky. Mix well and pour sparingly over the fiberglass cloth. Use a paintbrush to help the resin sink into the cloth evenly and smoothly.
Step 5: The second round of sanding. Once the catalyzed & resinated fiberglass hardens, it’s time to sand it. The goal is to get the surface down flush with the board and smooth out the edges of your work. You can use a power sander, but don’t sand too far down or you’ll put a hole in your board. For a small job, I just use a wooden block and wrap the sandpaper around it.
Final step: Mix a little more resin together with an extra few drops of catalyst (this is called a hot coat), then use the paintbrush to add a thin layer over your repair. When this has hardened, use fine-grit sandpaper (usually black in color, 220 grit) and add a few drops of water to achieve a shiny surface. You’re done!
Hopefully, this helps and will start you on your journey to being capable of fixing any type of damage to your board. For now just remember: leave the pressure dings and dents alone, and leave fixing snapped boards to the experts. Learning to do your own ding repair on minor surfboard damage may even result in charging harder and progressing faster because you’ll have fewer worries about a ding or crack and can focus on what really matters – which is always going to be surfing more!
Thanks.