
How to Put Stickers on a Surfboard
Lauren October 11th, 2018 Posted In: How-To Tags: Surfing
How to Put Stickers on a Surfboard
You know how there are some things in life that you can do and then re-do if you mess up? Yea, that’s nice and all but that doesn’t happen when it comes to adding stickers to just about anything, especially a surfboard. Bubbles, wrong placement, or a shotty job where the sticker comes off your board after one time out in the ocean is not cool. There’s nothing quite like being stoked about putting one of your favorite stickers on your board to show it off, only for it to, well, come off. Lucky for you though, we’re listing all the steps on how to put stickers on a surfboard.
First things first, make sure that the stickers are good quality. Vinyl ones are best! Also, another key piece of advice is to make sure that the weather is appropriate when you’re putting stickers on the board. Conditions like serious heat/humidity or cold conditions may mess with the adhesion of the sticker.
Step-By-Step Instructions:
Now, let’s get dive into the steps on how to put stickers on a surfboard:
- Make sure that the spot you are placing the sticker is EXACTLY where you want it. Once that sticker is there, oh, it’s there. You can’t really go back and re-do that decision. Have a credit card, debit card, library card, license – you get the hint – ready as you will need to use it to ensure that there are no air bubbles trapped between the board and the sticker.
- Once you’ve decided the spot, clean up that area really, really well. There can’t be any wax residue or imperfections. We’re talking a clean slate here. Plain old soap and water will do a good job at cleaning the spot(s) up. Also, make sure once that spot is cleaned, that it is dry!
- Now that you’ve got the spot figured out and it’s all clean, simply peel the backing off the sticker. Just don’t get the sticky part of the sticker stuck to something else. Stuff happens, but you just went through that entire process with your board and it would be such a bummer if you accidentally got the sticky part stuck to anything but the actual surfboard.
- Place one end of the sticker down first gently. You don’t want to just put the entire sticker down all at once. Use the credit/debit/whatever card as a ‘guide’ to carefully smooth the rest of the sticker out.
- Once the sticker is completely glued to the board, glide the card over to smooth any edges or bubbles.
- Let the sticker dry for a few hours.
- Now it’s time to show off your new stylin’ surfboard!
Pretty easy, right? With care and patience, you can have a surfboard decked out the way you want it! And if you’re a visual kind of person, here’s your step-by-step picture guide:
-
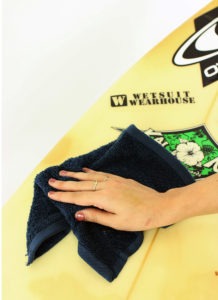
- Clean off the area.
-
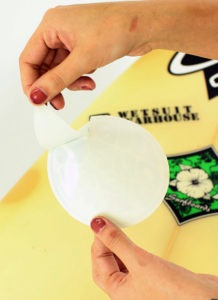
- Peel off the sticker backing.
-
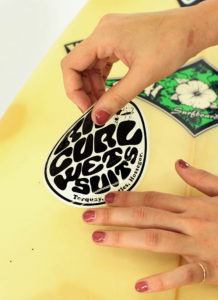
- Gently place one end down.
-
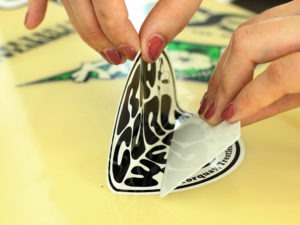
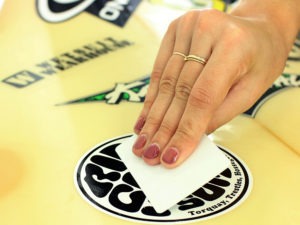
- Use a card to place the sticker.
-
- Smooth edges & air bubbles.
-

- Show off your new sticker!